
Anyway, I have made a Doctor Who bead scarf thing. For any of you who don't know, Tom Baker's protrayel of the Doctor included an impractically long scarf. The story goes that costume designer James Acheson wanted a scarf for the Doctor, and when he gave his friend Begonia Pope the yarn, which did not stop knitting until she had used all of it, making what is probably the most iconic piece of Who accessories ever.

I saw, here and there across the internet, bead scarfs made in roughly the same pattern. )Though I never found anyone offering instructions on how to make it.) I decided, as a fan of the show myself, that it would be fun to make one. I have a bead loom, which I love to make things one, but it is rare that I can think of something to make on it that I will actually use. So when I decided I had the funds I would make one.
I based my own scarf on the pattern you see below.

Having found the pattern, next I needed to purchase the beads. Living in a small town there really aren't any bead stores in town, the best I had was a Hobby Lobby. Since I needed a large number of seed beads, in rather specific colors, I wanted something with more options that what I could find at a store like Hobby Lobby. So of course I turned to the internet (like I always do). I found this great beading site called Fusion Beads. Seriously, if you like beading you should check it out. After browsing their selection I finally decided on my seven colors. I've listed the item number with each color if you are interested.

Purple-SB1501
Off white-SB2052
Brown-SB2448
Yellow-SB1530
Red-SB2605
Green-SB2497
Blue-SB2497
Now all I had left to do was actually make it. As my bead loom is only about a foot long, I had to be creative with how I made the bead scarf. My initial idea was to it in several parts and sew them together, but I didn't want all those seams, so I worked it out in a different way. If you look carefully at the first picture you'll see a bunch of string off to the side of the loom trailing off the table. I cut each piece of string to be about twice as long as I wanted the bead scarf to be, folded it in half, and then tied it to the loom. As I finished one segment, I would untie the ends, move it down, safety pin the already beaded end of the scarf down, and retie to loose ends.

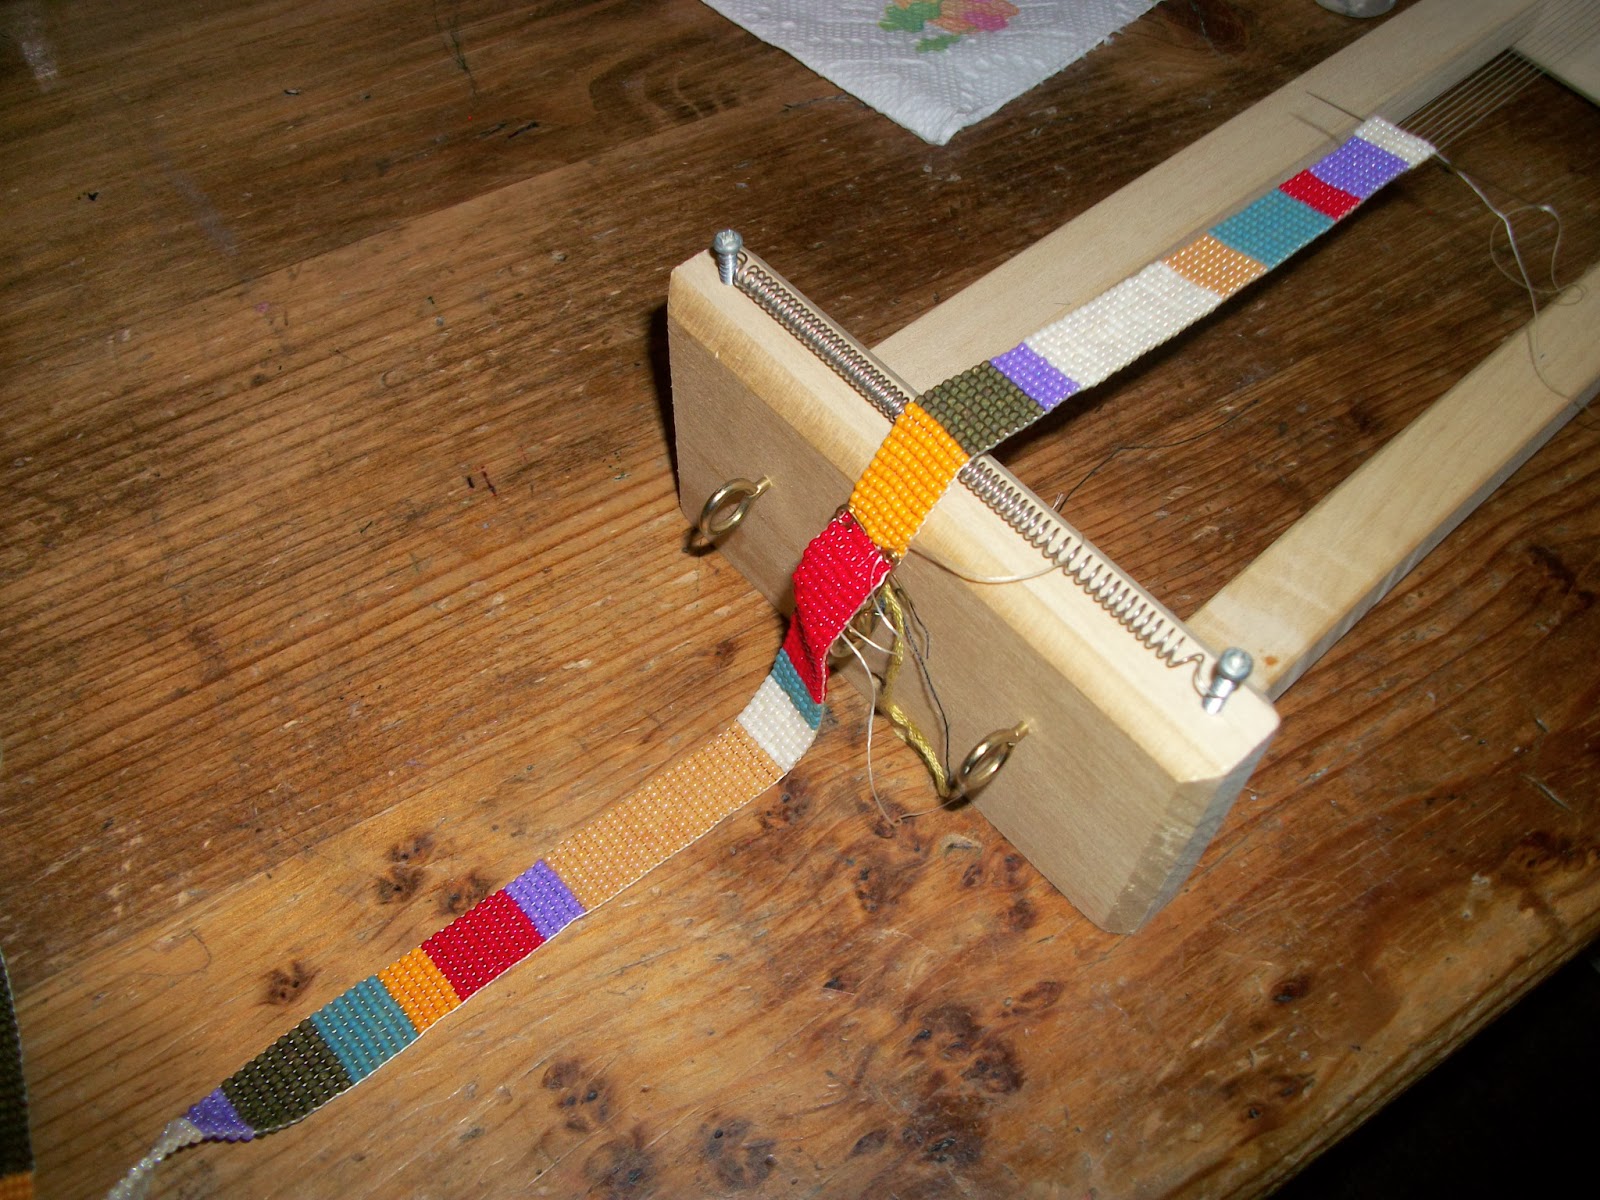
All I did was half the number of rows-so 2 rows in the pattern meant I only did one row on the bead loom.-and other than that I stayed true to the pattern I found. I also used all 11 sized beads, with 9 beads in each row. With these specs my bead scarf came out at about 62 inches (157.5 cm) long and 0.5 inches (1.27 cm) wide. So still quite long, but not outrageously so.


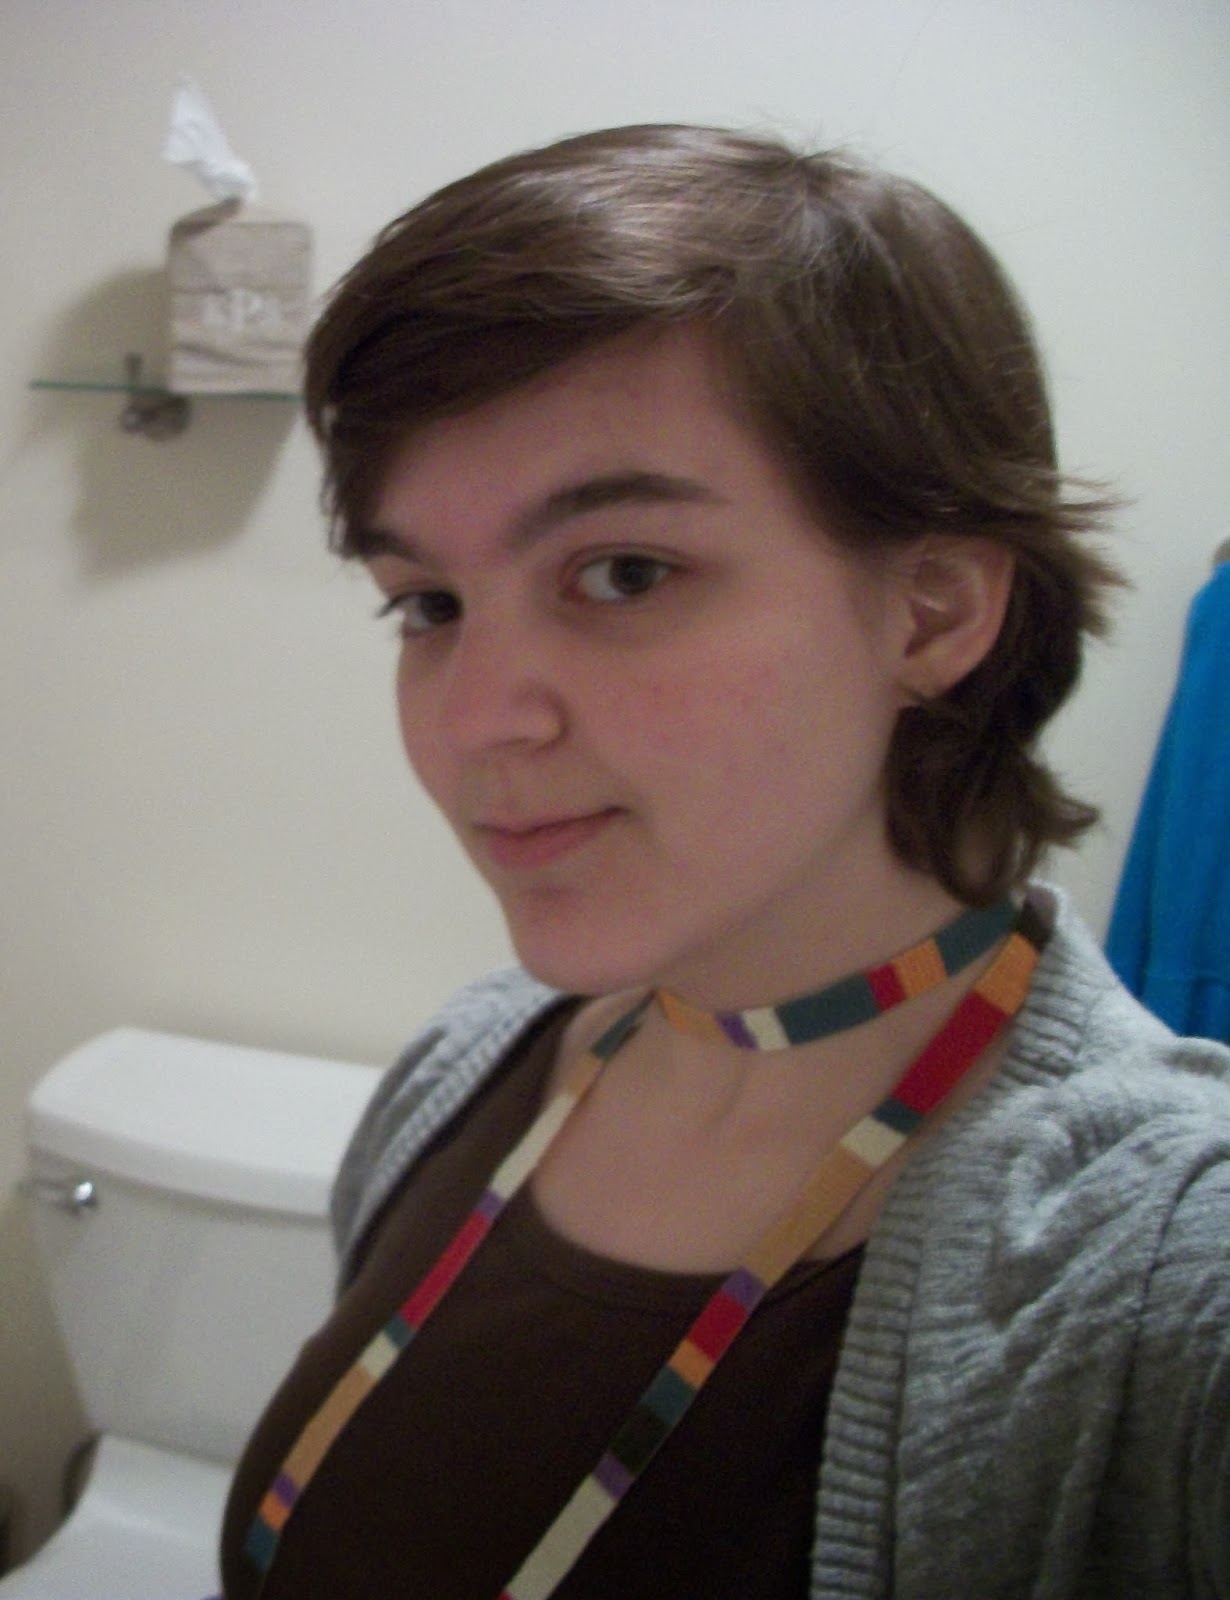
And here are some pics of my modeling the Doctor Who bead scarf. Yes I am in a bathroom. I also tried to enlist my sister for some full body shots but as always she proves what a bumbling photographer she is.
 |
| I am being lovely |
 |
| I am trying really hard to get a full view of the scarf, also I realized I am in the bathroom. |
 |
| Trying a different way to wear the scarf. |
No comments:
Post a Comment